 Fun With Light Trails
Light Trails take a bit of imagination to conceptualize and shoot. While not vital, it helps to be able to plot out how you want your image to appear to understand the camera settings for this type of photography.
Here’s the deal; light comes in to your camera and hits your sensor. As mentioned previously, your sensor’s pixels and little scales measuring the amount of light ‘weighing’ on them (‘striking’ them is another way to think of it and is more accurate).
The more light that hits the sensor, the higher the scale reads. Most pixels have a scale from 0-255. 0 is black. 255 is all filled up with that particular pixel’s color (red, green, blue…if you need a diagram, check out the post on ISO).
How Light Trails
All fine and well. What happens to create a light trail? Light from a source moves across the scene in front of the camera and is emitting light (or reflecting it, but let’s stick with an actual light sources here, like a lightbulb, or the glowing eyes of the Yeti which actually emit light. Look it up).
As it moves from left to right, let’s say, it essentially ‘paints’ the pixels in its path with something brighter than what was behind it. Often these shots are taken at night, so the background is really dark, maybe a 20 on that 0-255 scale. Now this bright light comes along and pushes the pixel ‘scales’ up to 240 or even maxes them out to 255.
The pixels can’t go back down the scale and thus they show the bright 240 reading even though the light source has moved on to the pixels next to them.
Confused?
I kinda am, so let’s look at a pretty picture.
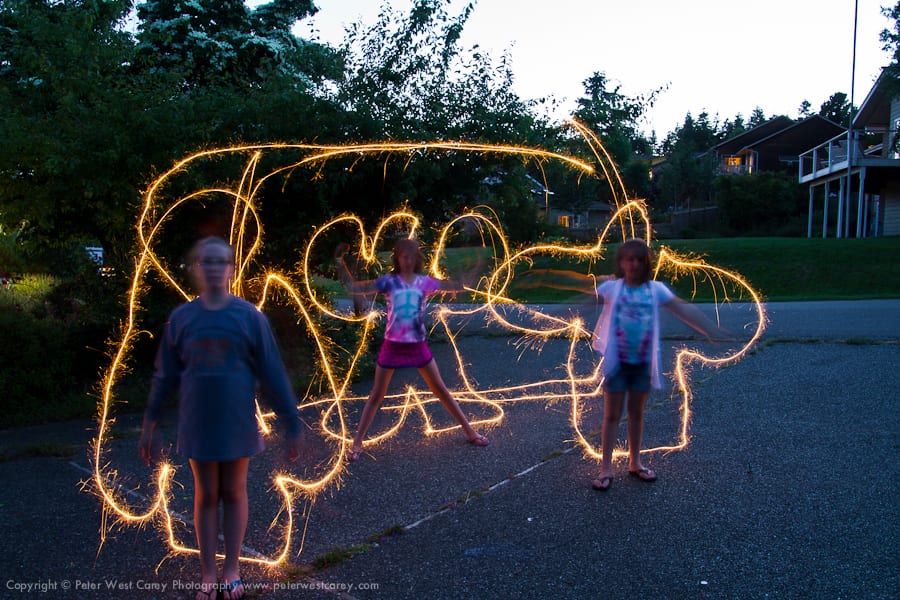
In this Fourth Of July shot I had the kids stand completely still. I then took a lit sparkler and traced it around them. It’s one of the few times I could get my daughter to remain still, so I I tried it many times to get the above image.
Because the sparkler (emitting light all over the place) was brighter than the background, and the shutter was open for 30 seconds, I was able to trace and have that brightest light recorded on the sensor.
Another pretty picture.

This shot is from Nepal with its mountains and chances to see stars. The exact same thing is happening here, believe it or not. Well, kinda.
On a simple scale I am holding the camera still on planet Earth and it is rotating. The stars are (perceptively, but not actually) holding still. So when the camera moves and the light source holds still, the light appears to move. Which is cool! In this case, the shutter was left open for 445 seconds.
There are two basic ways to go about recording light trails, be they Earth bound or in the heavens.
Method 1 – Long Exposure
This is the method in the first image above. I left the shutter open for 30 seconds in Shutter Priority mode. If you have a cable release or remote control for your camera, you can hold the shutter open even longer (or just hold down the shutter release when in Bulb mode, which might require switching to Manual mode). The long exposure method has its limits and challenges.
First of all, your subject needs to not move, otherwise it will appear blurred while the light trail is painted. I’m talking here about the subject, not the light that is doing the trailing.
Having kids stand still for 30 seconds is about the limits of this challenge according to the laws of physics. Even a relatively slow shutter speed can create light trails. Take a look at this .8 second long exposure of the Ferris wheel at the Santa Monica pier in California.
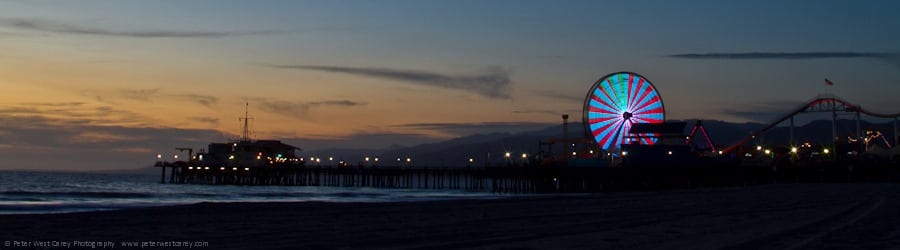
.8 seconds might not be long on the back of a bull, but it is long enough to give just the right movement to the lights on the wheel. In this case, it was pretty easy to get the pier to not move (barring earthquakes).
Get a tripod
Or, if no tripod is handy (as in the picture above) use anything that you can that won’t move. In this case I set my backpack down on the sand, positioned the camera on the back of it and used a self timer to ensure I wasn’t moving the camera, blurring the pier.
Another example. This shot is 20 seconds long and is taken in downtown Langley, Washington.

Method 2 – Stacking Multiple Images
The other main method is to stack multiple, shorter shutter length images into one final image. This takes a special program or Photoshop skills. I downloaded a simple program that costs $17 call Image Stacker. And it does just that. The method used to create light trails is called “Brightest”. Opps! Let me take a step back.
First, plan and take the photos
So step one would be to take the images. You set up your camera on a sturdy surface or tripod. Something non-moving (which begs the question of why I attempted this demo in California). Using either your finger to keep pressing the shutter lease, or a handy product called an intervalometer, take a series of images, one after the other, as close together as you can. This can lead to hundreds of images, or maybe just a dozen if you like.
Back at home
In your computer throw these images (in JPEG or TIFF format) at Image Stacker, choosing the ‘Brightest’ option. The program then looks at the same pixel in each image and only uses the brightest one.
It does this for how many ever millions of pixels you have. If you are shooting at a mainly black sky, for instance, it will see black in all of those pixels except for when a start moves across. Then it will just show that bright spot.
In this way you get trails, which may have spaces in them depending on the time between shots and how fast the objects are moving. By way of example, let me show you a test I did.
Example
I shot 150 frames of the view from Santa Monica towards LAX airport to the south. Each frame was .8 seconds long and a shot was taken each second. I then assembled the images using Lightroom and this cool plugin. The video it spit out looked like…
If I take those same images and stack them, I receive the image below:

Kinda cool. If I had taken one second exposures, the spaces in between lines would be less.
Photoshop can even be employed to create this effect. More information here.
Here’s an experiment to try
If you need some more pointers and want to try this yourself, I have a post on my 40 Photography Experiments series.
Fin!
I hope those two methods of creating light trails start you thinking about what you can create. Don’t look to the stars for all your inspiration, grab any type of light and see what you can create!
 Photography Basics – A 43 Day Adventure, and its companion 40 Photography Experiments, are series written by professional photographer Peter West Carey. The series are designed to unravel the mysteries of photography, helping you take better pictures. Subscribe here to receive all the updates and bonus material. Your comments are always welcome.
![]() If you enjoy the series, consider learning photography first-hand on a professionally led international photo tour in Nepal or Bhutan. More information can be found at Far Horizon Photo Tours.
If you enjoy the series, consider learning photography first-hand on a professionally led international photo tour in Nepal or Bhutan. More information can be found at Far Horizon Photo Tours.